> ## Documentation Index
> Fetch the complete documentation index at: https://docs.corvic.ai/llms.txt
> Use this file to discover all available pages before exploring further.
# Agents
> Configure and use AI agents to interact with your data
Agents are AI-powered assistants that can answer questions about your data, execute code, generate visualizations, and orchestrate multi-step workflows — all grounded in your verified enterprise data.
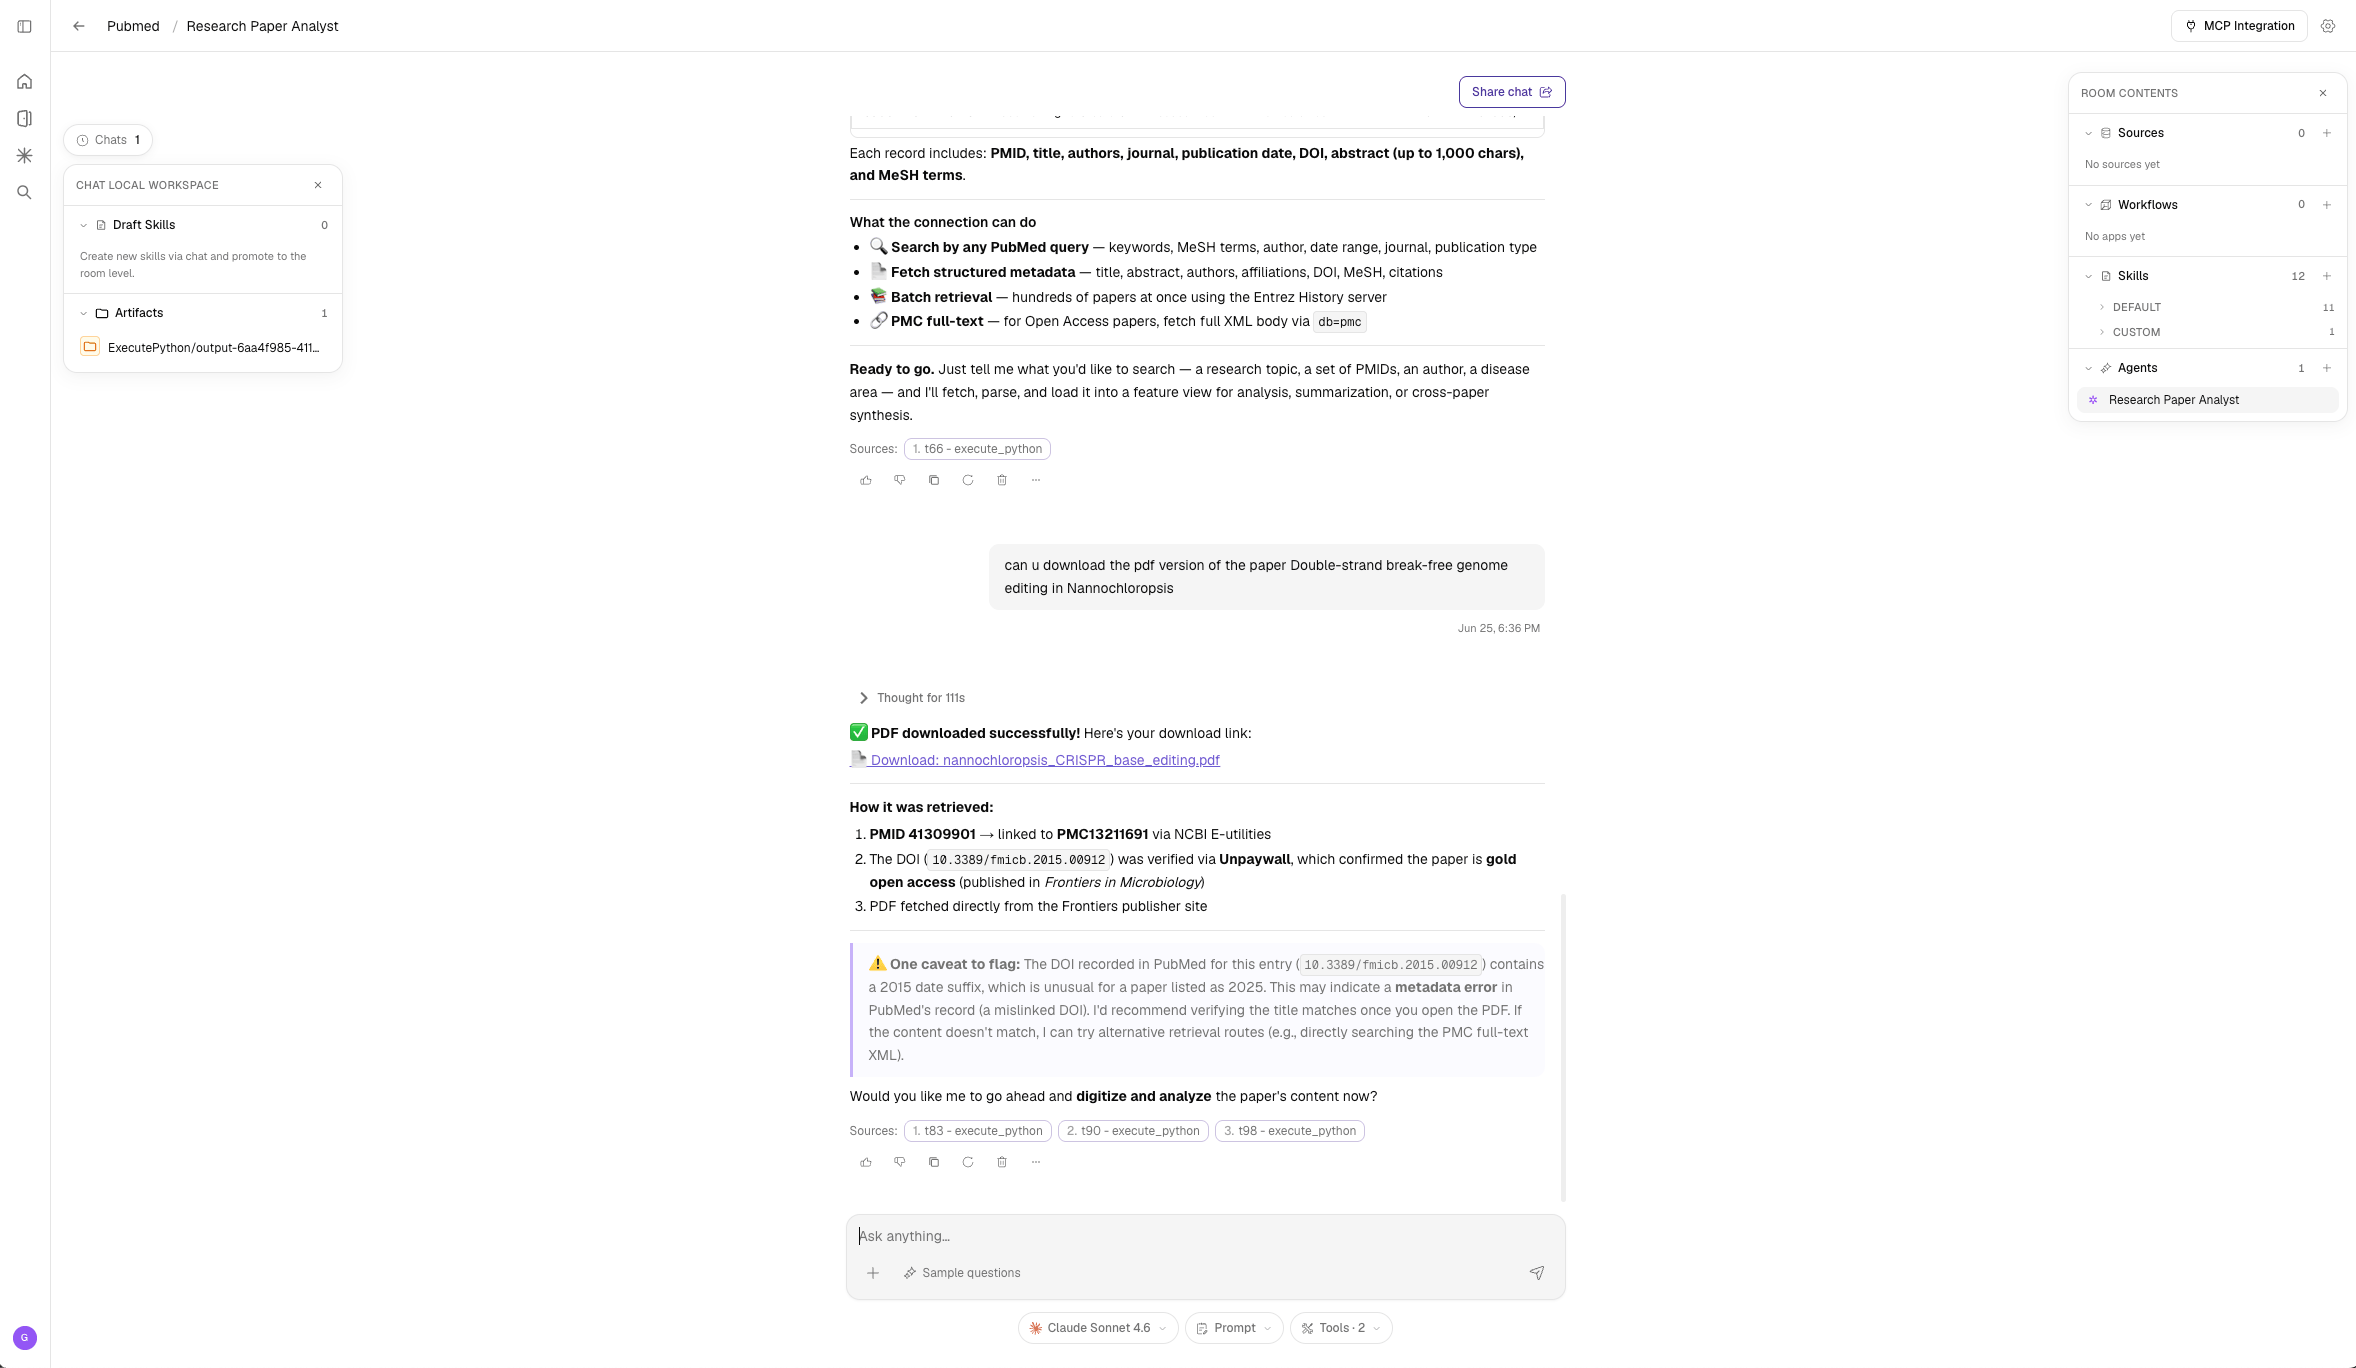 ## Configuration
### Model Selection
Choose a completion model for your agent from the model dropdown, or let **Auto** pick the right model for you:
* **Auto** — automatically selects an appropriate model
* **Claude Sonnet 4.6**
* **Claude Opus 4.8**
* **GEMINI 2.5 Pro**
* **GPT 5.4**
* **Bring your own LLM** — add your own [LLM endpoints](/features/admin-console#llm-integrations) to bring your own models into Corvic
Custom LLM endpoints configured for your organization also appear in this list.
The Agent tab also shows the **MCP Tools** connected to your agent (such as web search, file access, and database queries) and any **Corvic Apps** linked to the agent for data pipeline access.
### Skills, Artifacts & User Files
The agent sidebar provides quick access to key capabilities:
* **Summary** — A conversation summary that updates as you chat, with an audio summary option (coming soon)
* **Skills** — Reusable agent skills that extend what your agent can do. Add new skills by chatting with the agent itself, or use the "+" button to upload new skills.
* **Artifacts** — Outputs generated during conversations (tables, charts, code) are collected here for easy access
* **User Files** — Upload documents directly into the chat for the agent to process and use as context
### Agent Appearance
Customize how your agent looks and is described. Click on the agent name to open the Appearance settings, where you can configure:
* **Name & Description** — Give your agent a clear identity
* **Quick Start Video URL** — Link a video to help users get started
* **App Documentation URL** — Point users to relevant documentation
* **Color & Icon** — Choose a brand color and icon, or upload your own
## Chatting
Ask your agent a question in the chat input. The agent will orchestrate a chain of actions — querying tables, executing Python code, generating visualizations — to deliver a context-aware response grounded in your data.
Complex queries may take a minute or two as the agent reasons through multiple steps. You can watch the thought process unfold in real time.
### Conversations & Threads
Each conversation with an agent is a **thread**. You can keep multiple threads per agent, rename them, and delete the ones you no longer need. Threads are addressable by URL, so you can return to — or share — any conversation.
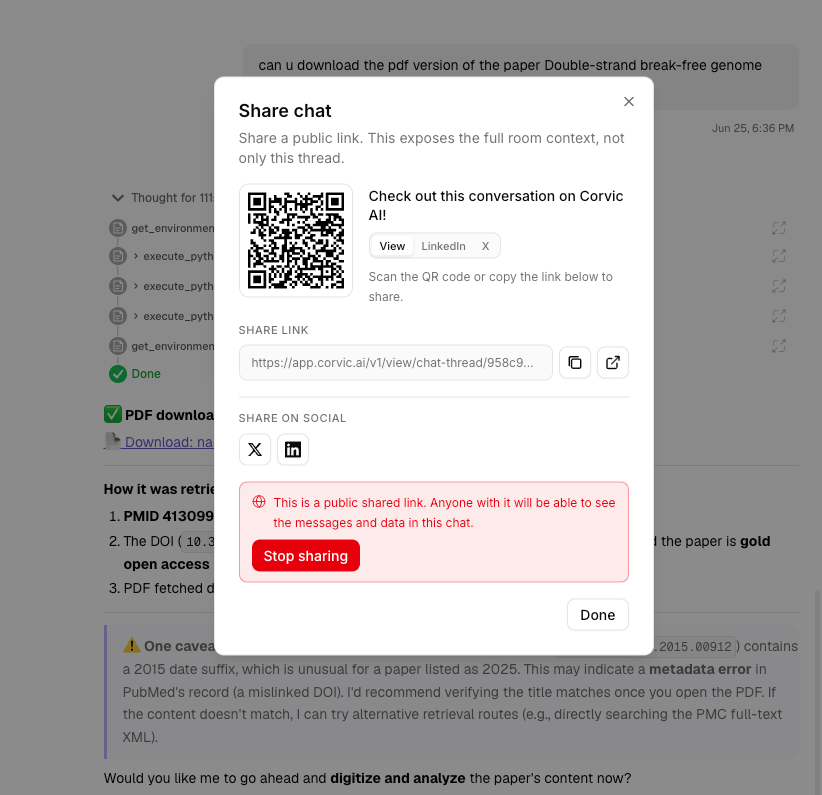
Any thread can be published as a read-only public link, and the artifacts a thread produces can be shared individually. See [Sharing & Collaboration](/features/sharing) for details.
## Explainability
### Thought Process
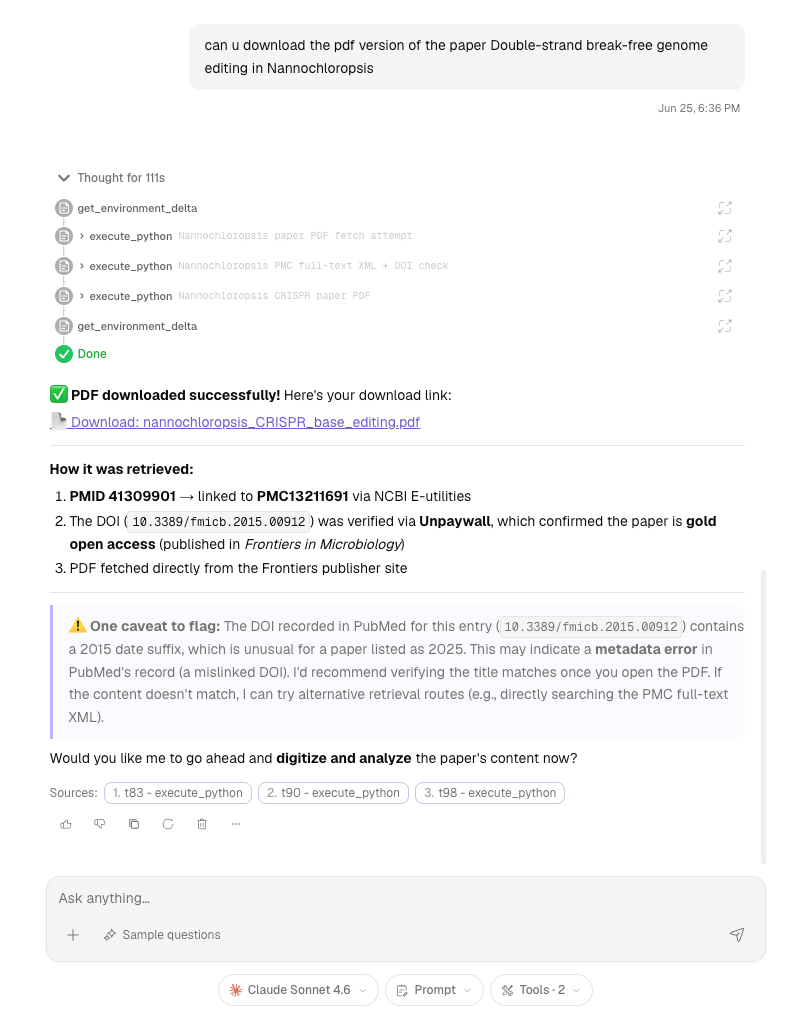
Every agent response includes a transparent view of the reasoning chain. As the agent works, you can see each action it takes — listing tables, retrieving data, executing Python, generating plots — displayed as a step-by-step flow.
## Configuration
### Model Selection
Choose a completion model for your agent from the model dropdown, or let **Auto** pick the right model for you:
* **Auto** — automatically selects an appropriate model
* **Claude Sonnet 4.6**
* **Claude Opus 4.8**
* **GEMINI 2.5 Pro**
* **GPT 5.4**
* **Bring your own LLM** — add your own [LLM endpoints](/features/admin-console#llm-integrations) to bring your own models into Corvic
Custom LLM endpoints configured for your organization also appear in this list.
The Agent tab also shows the **MCP Tools** connected to your agent (such as web search, file access, and database queries) and any **Corvic Apps** linked to the agent for data pipeline access.
### Skills, Artifacts & User Files
The agent sidebar provides quick access to key capabilities:
* **Summary** — A conversation summary that updates as you chat, with an audio summary option (coming soon)
* **Skills** — Reusable agent skills that extend what your agent can do. Add new skills by chatting with the agent itself, or use the "+" button to upload new skills.
* **Artifacts** — Outputs generated during conversations (tables, charts, code) are collected here for easy access
* **User Files** — Upload documents directly into the chat for the agent to process and use as context
### Agent Appearance
Customize how your agent looks and is described. Click on the agent name to open the Appearance settings, where you can configure:
* **Name & Description** — Give your agent a clear identity
* **Quick Start Video URL** — Link a video to help users get started
* **App Documentation URL** — Point users to relevant documentation
* **Color & Icon** — Choose a brand color and icon, or upload your own
## Chatting
Ask your agent a question in the chat input. The agent will orchestrate a chain of actions — querying tables, executing Python code, generating visualizations — to deliver a context-aware response grounded in your data.
Complex queries may take a minute or two as the agent reasons through multiple steps. You can watch the thought process unfold in real time.
### Conversations & Threads
Each conversation with an agent is a **thread**. You can keep multiple threads per agent, rename them, and delete the ones you no longer need. Threads are addressable by URL, so you can return to — or share — any conversation.
Any thread can be published as a read-only public link, and the artifacts a thread produces can be shared individually. See [Sharing & Collaboration](/features/sharing) for details.
## Explainability
### Thought Process
Every agent response includes a transparent view of the reasoning chain. As the agent works, you can see each action it takes — listing tables, retrieving data, executing Python, generating plots — displayed as a step-by-step flow.
 ### Action Output
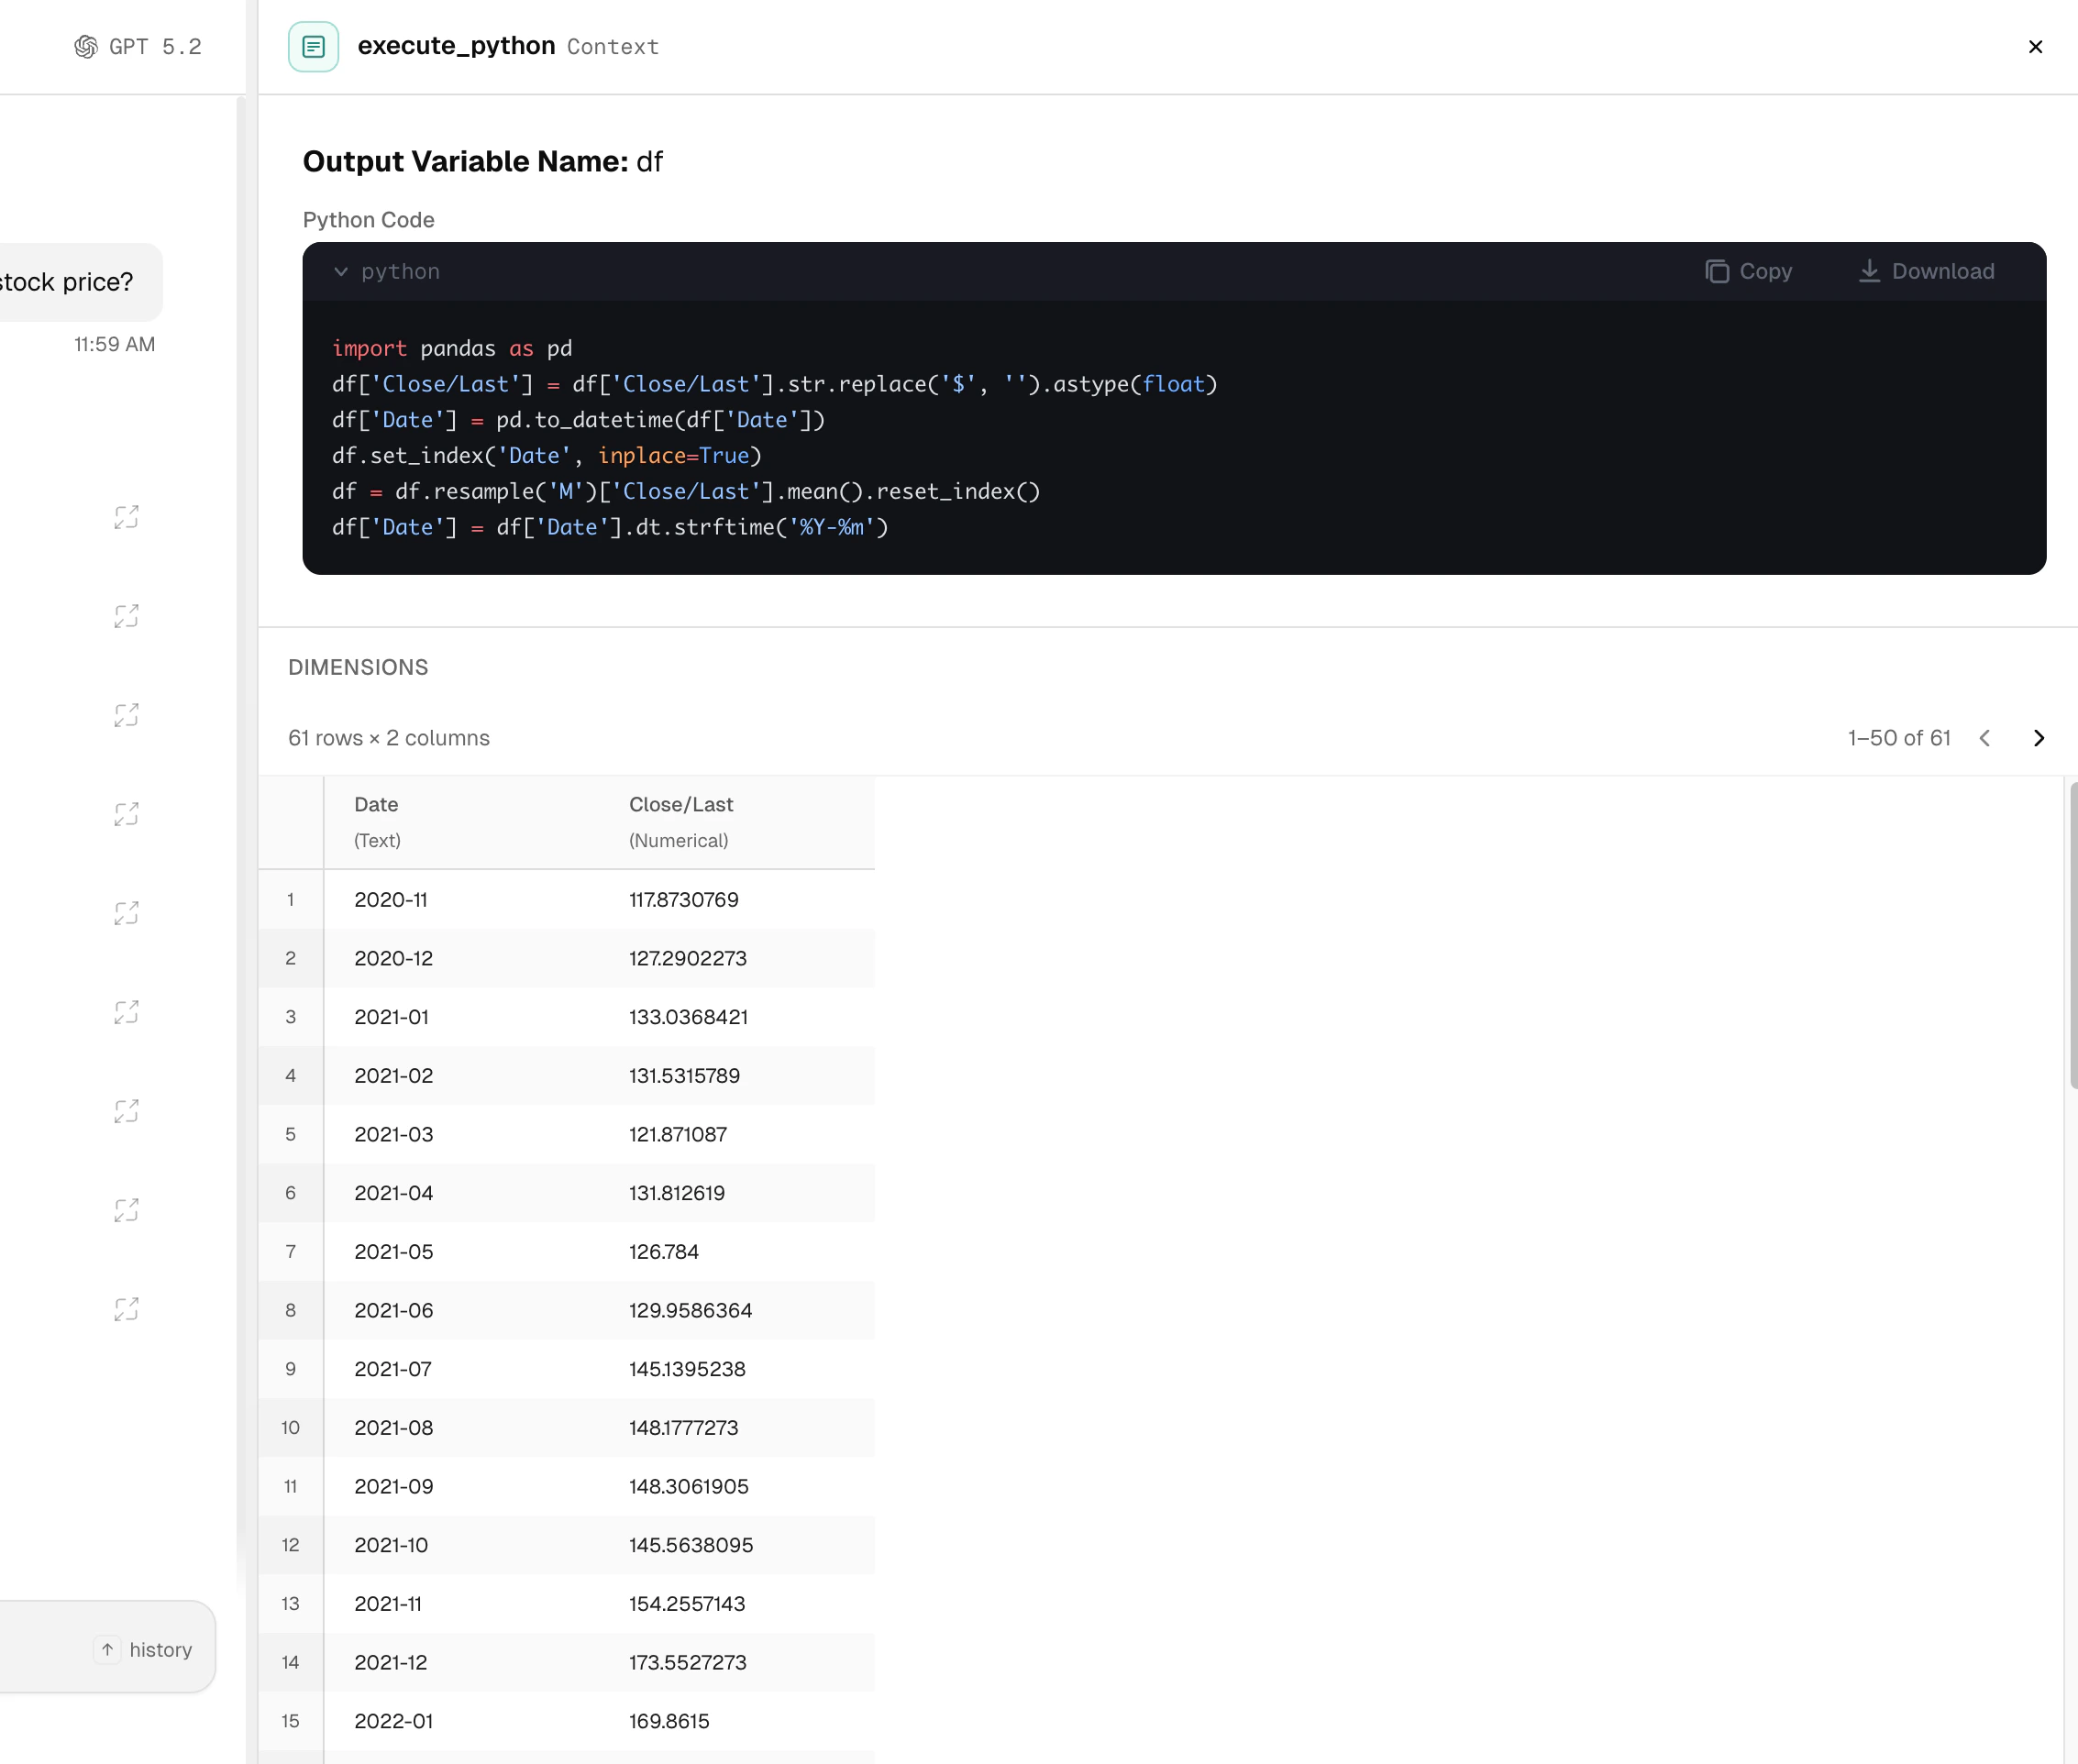
Click on any action step to inspect its full output. For code execution steps, you can view the Python code that was run, the output variables, and the resulting data tables — giving you complete transparency into how the agent arrived at its answer.
### Action Output
Click on any action step to inspect its full output. For code execution steps, you can view the Python code that was run, the output variables, and the resulting data tables — giving you complete transparency into how the agent arrived at its answer.
 ## Sharing & Integration
### Sharing
Share your agent with teammates or external users from the **Integration & Sharing** dialog.
Open the "Integration & Sharing" dialog and select the **Sharing** tab.
Use **Invite by Email** to send direct invitations and manage access roles, or **Share Link** to generate a shareable URL.
Add **Password Protection** to require a password before anyone can open the shared agent.
## Sharing & Integration
### Sharing
Share your agent with teammates or external users from the **Integration & Sharing** dialog.
Open the "Integration & Sharing" dialog and select the **Sharing** tab.
Use **Invite by Email** to send direct invitations and manage access roles, or **Share Link** to generate a shareable URL.
Add **Password Protection** to require a password before anyone can open the shared agent.
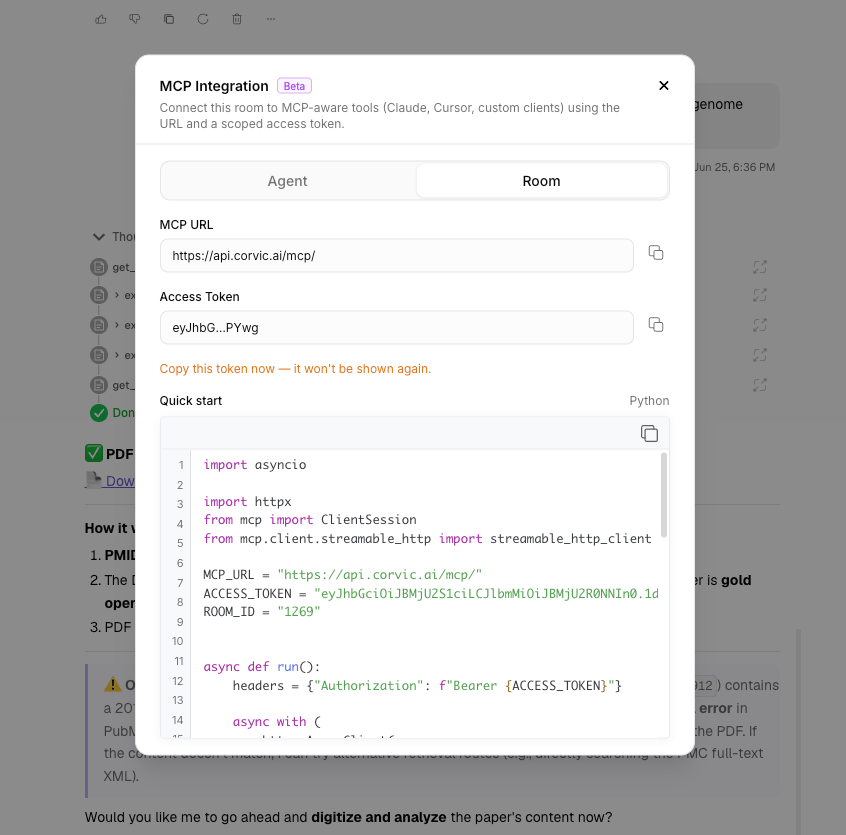
 ### MCP Integration
Integrate your agent directly into external applications using the MCP protocol.
In the "Integration & Sharing" dialog, switch to the **Integration** tab.
Use the buttons to copy your **MCP URL** and **Access Token**.
Copy the ready-to-use **Python** or **Node.js** snippet and connect from your application.
### MCP Integration
Integrate your agent directly into external applications using the MCP protocol.
In the "Integration & Sharing" dialog, switch to the **Integration** tab.
Use the buttons to copy your **MCP URL** and **Access Token**.
Copy the ready-to-use **Python** or **Node.js** snippet and connect from your application.
 See our [integration guides](/integrations/overview) for detailed examples on connecting agents to your applications.
## Related Documentation
Run reusable, multi-stage plans the agent executes for you.
Learn about creating embedding spaces for agents.
Share read-only chat threads and individual artifacts.
Create agents using the Create Agent action in workflows.
Connect external APIs for your agents to call.
Integrate agents with your applications.
Connect agents via the MCP protocol.
See our [integration guides](/integrations/overview) for detailed examples on connecting agents to your applications.
## Related Documentation
Run reusable, multi-stage plans the agent executes for you.
Learn about creating embedding spaces for agents.
Share read-only chat threads and individual artifacts.
Create agents using the Create Agent action in workflows.
Connect external APIs for your agents to call.
Integrate agents with your applications.
Connect agents via the MCP protocol.