> ## Documentation Index
> Fetch the complete documentation index at: https://docs.corvic.ai/llms.txt
> Use this file to discover all available pages before exploring further.
# Quickstart
> Get started with Corvic in minutes
## Get started in three steps
Get your first embedding space running and start deriving insights from your data.
Skip the manual setup. A [Room Template](/features/room-templates) launches a room with a
pre-configured agent, skills, and starter questions — just add your data and start asking.
Prefer to build from scratch? Follow the three steps below.
### Step 1: Access the Platform
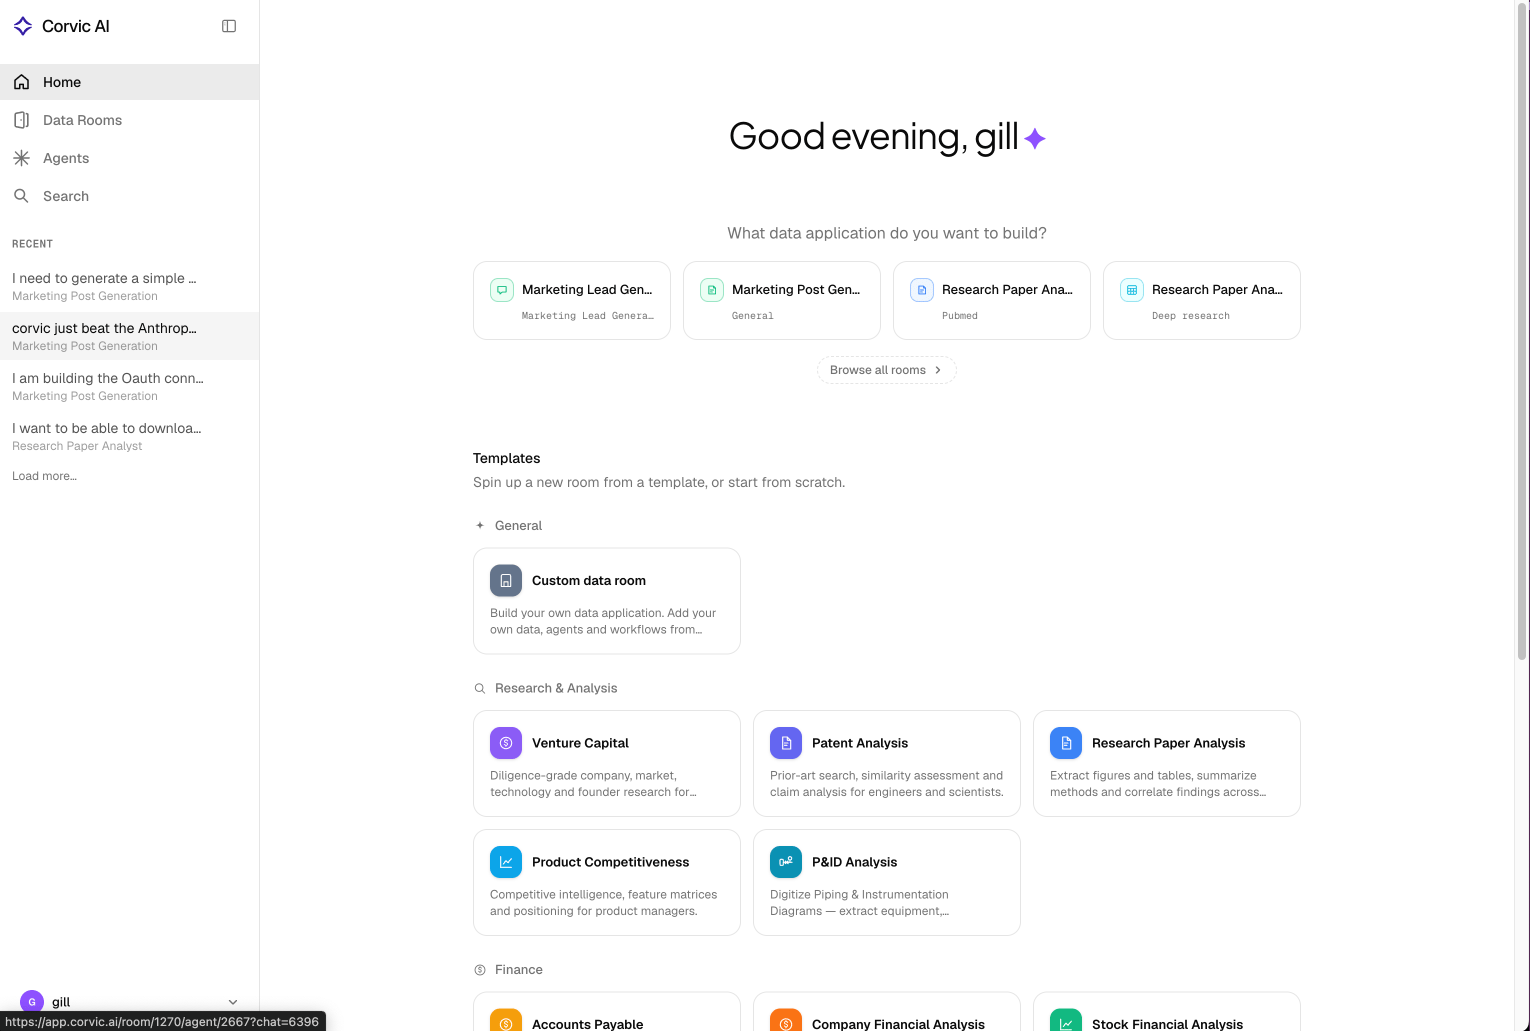 Visit [app.corvic.ai](https://app.corvic.ai) to create your account and access the Corvic Platform.
Once you've created your account, you'll have access to your organization dashboard where you can manage users, roles, and data rooms.
Data Rooms are exclusive workspaces where you can upload and manage your data.
1. Navigate to the Rooms section in your dashboard
2. Click "Create New Room"
3. Give your room a descriptive name
4. Your room is now ready for data ingestion
Each data room is isolated, meaning data in one room is not accessible from another.
### Step 2: Upload and Process Data
Visit [app.corvic.ai](https://app.corvic.ai) to create your account and access the Corvic Platform.
Once you've created your account, you'll have access to your organization dashboard where you can manage users, roles, and data rooms.
Data Rooms are exclusive workspaces where you can upload and manage your data.
1. Navigate to the Rooms section in your dashboard
2. Click "Create New Room"
3. Give your room a descriptive name
4. Your room is now ready for data ingestion
Each data room is isolated, meaning data in one room is not accessible from another.
### Step 2: Upload and Process Data
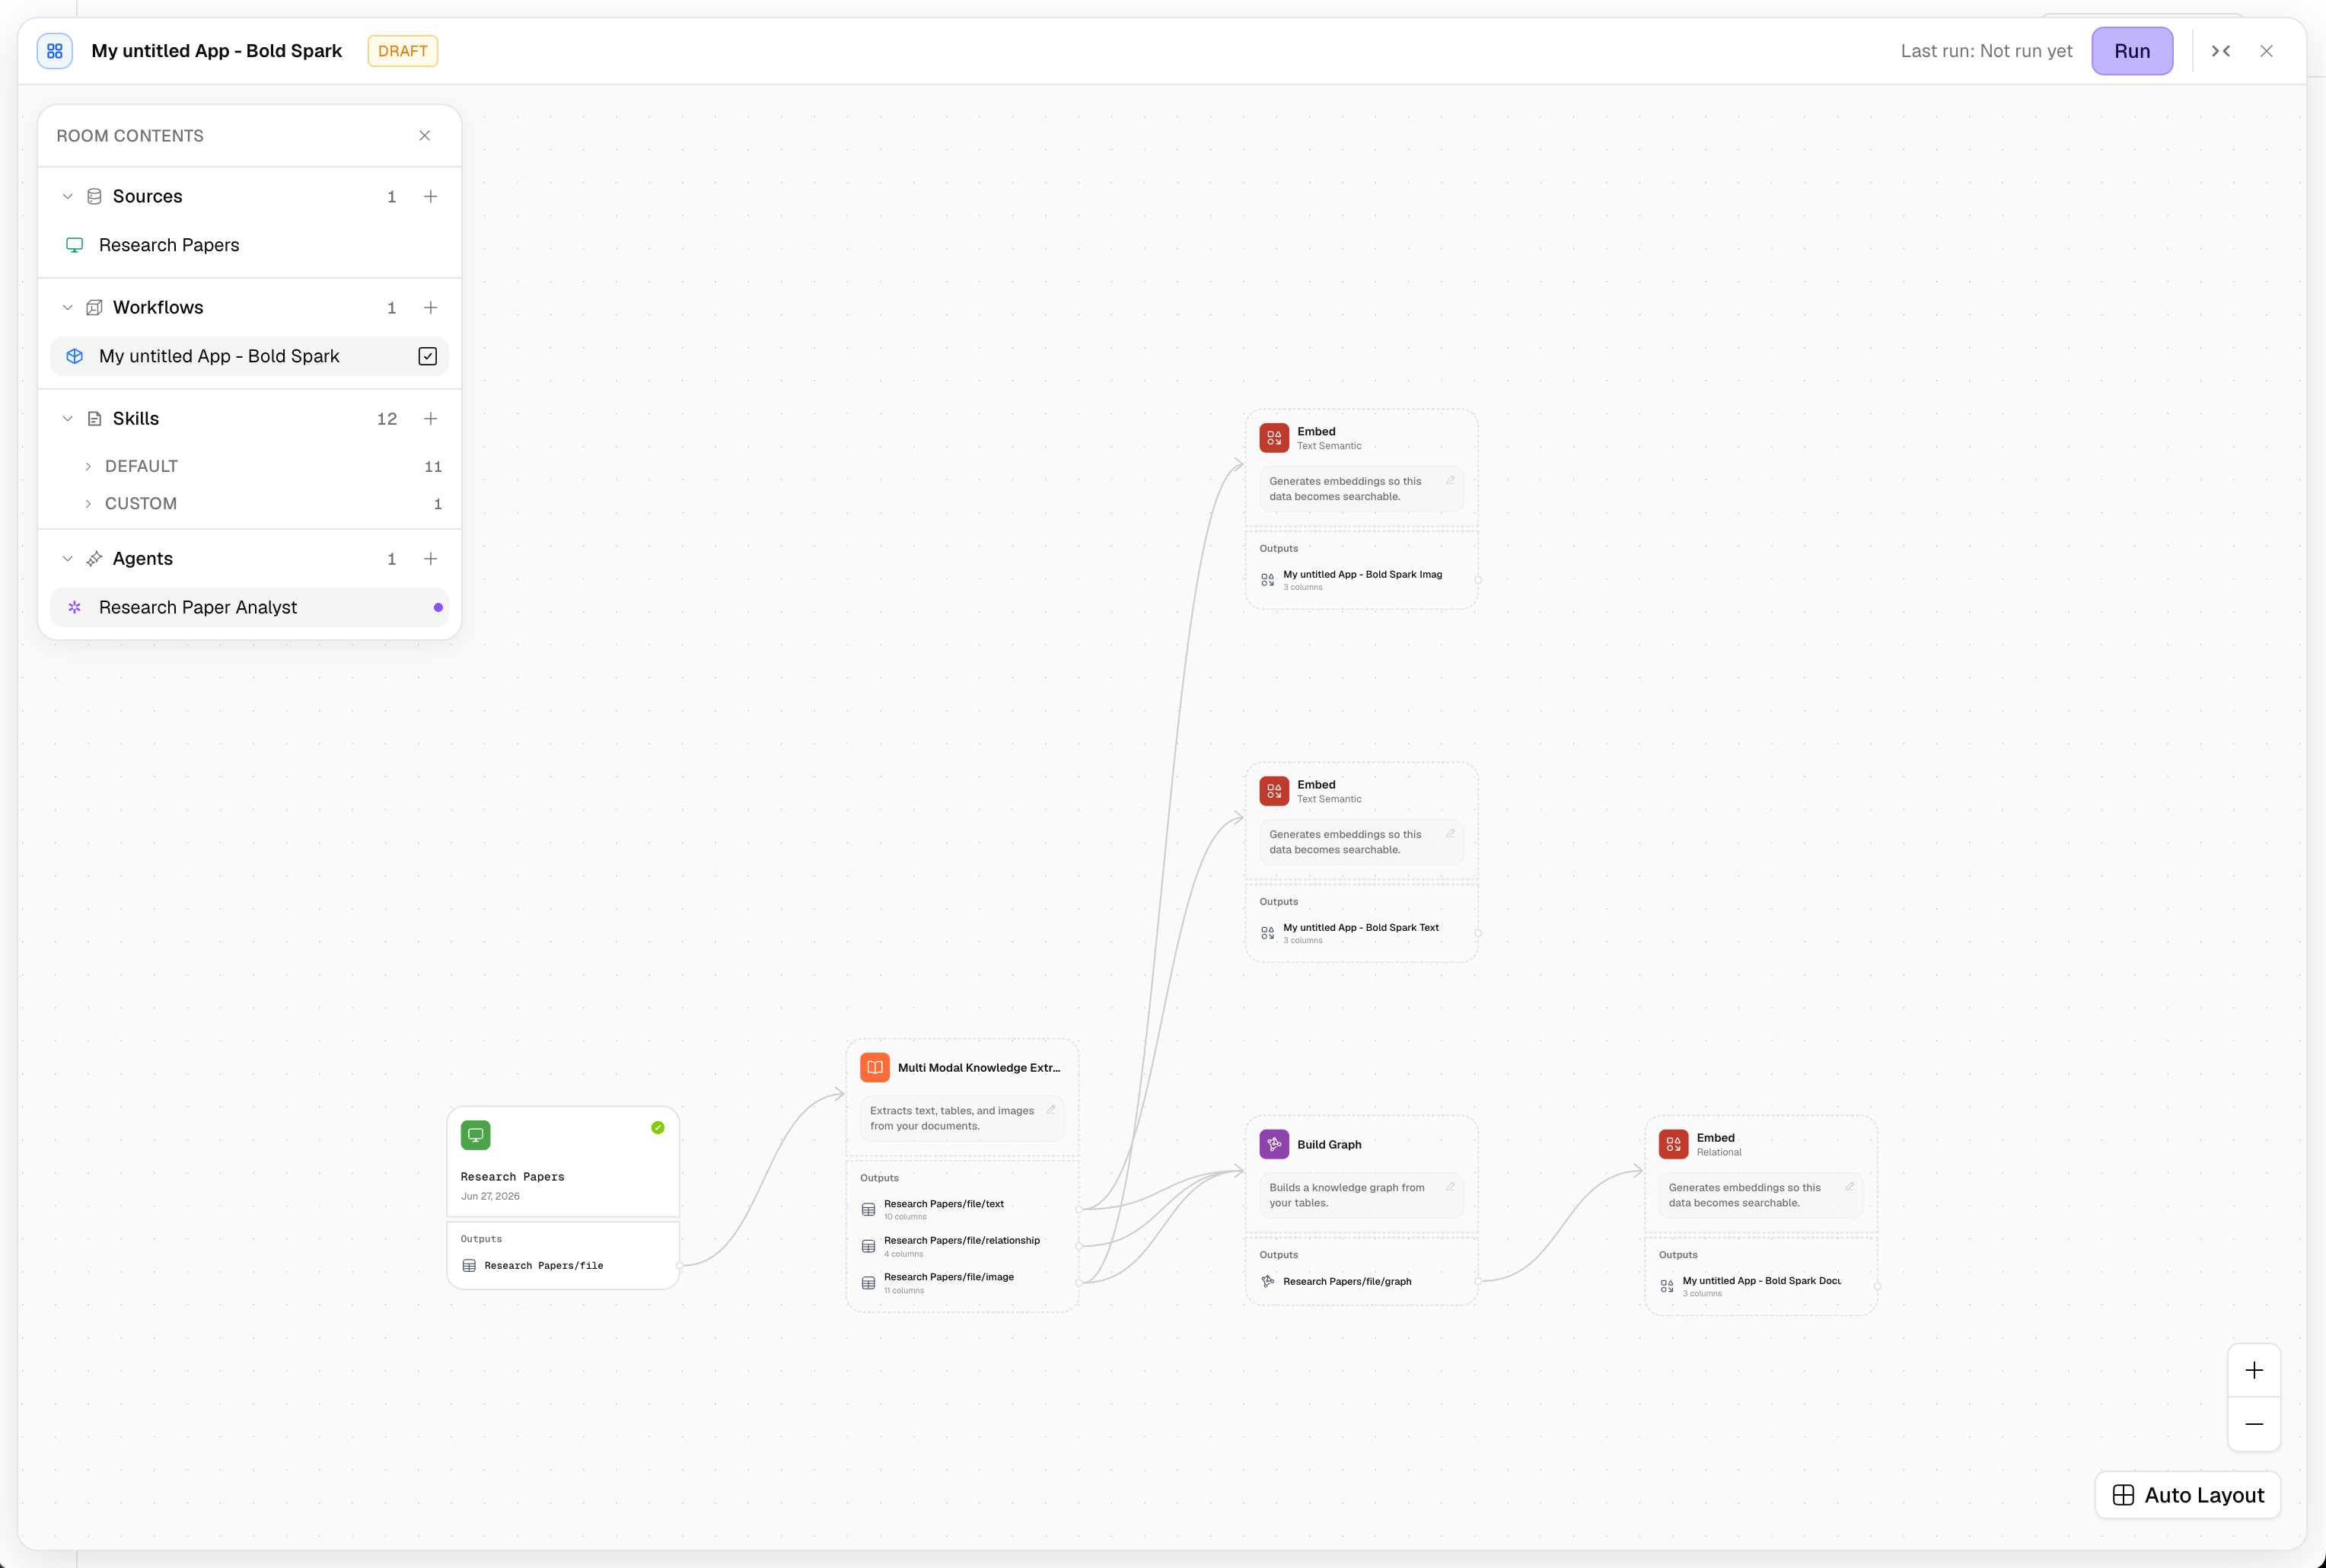 Upload your data to the data room:
1. Navigate to your data room
2. Go to the Data Sources section
3. Click the "+" button next to "Data Sources"
4. Upload your data files (supports parquet, PDF, PPTX, TXT, MD, DOCX, HTML, and other formats)
5. Wait for the data to be uploaded and processed
You can upload files from your local system or connect to external storage buckets like Amazon S3 or Azure Blob Storage.
Create a workflow to parse, clean/augment data, and embed it:
1. Click "Create Workflow" in your data room
2. Give your workflow a name and description
3. Drag and drop your data sources onto the canvas
4. Click the "+" button next to the data source to view available actions
5. Apply actions to process your data:
* **Parse**: For unstructured data (extracts textual, structural, and image information)
* **Extract Tables**: For structured data (analyzes and generates tabular outputs)
6. Create Corvic Tables from the processed data
7. Use the **Embed** action to generate embeddings from your Corvic Tables
8. Click "Run" to execute the workflow
You can use the "Apply Template" action to quickly set up a KnowledgeGraph RAG pipeline.
### Step 3: Create an Agent
Upload your data to the data room:
1. Navigate to your data room
2. Go to the Data Sources section
3. Click the "+" button next to "Data Sources"
4. Upload your data files (supports parquet, PDF, PPTX, TXT, MD, DOCX, HTML, and other formats)
5. Wait for the data to be uploaded and processed
You can upload files from your local system or connect to external storage buckets like Amazon S3 or Azure Blob Storage.
Create a workflow to parse, clean/augment data, and embed it:
1. Click "Create Workflow" in your data room
2. Give your workflow a name and description
3. Drag and drop your data sources onto the canvas
4. Click the "+" button next to the data source to view available actions
5. Apply actions to process your data:
* **Parse**: For unstructured data (extracts textual, structural, and image information)
* **Extract Tables**: For structured data (analyzes and generates tabular outputs)
6. Create Corvic Tables from the processed data
7. Use the **Embed** action to generate embeddings from your Corvic Tables
8. Click "Run" to execute the workflow
You can use the "Apply Template" action to quickly set up a KnowledgeGraph RAG pipeline.
### Step 3: Create an Agent
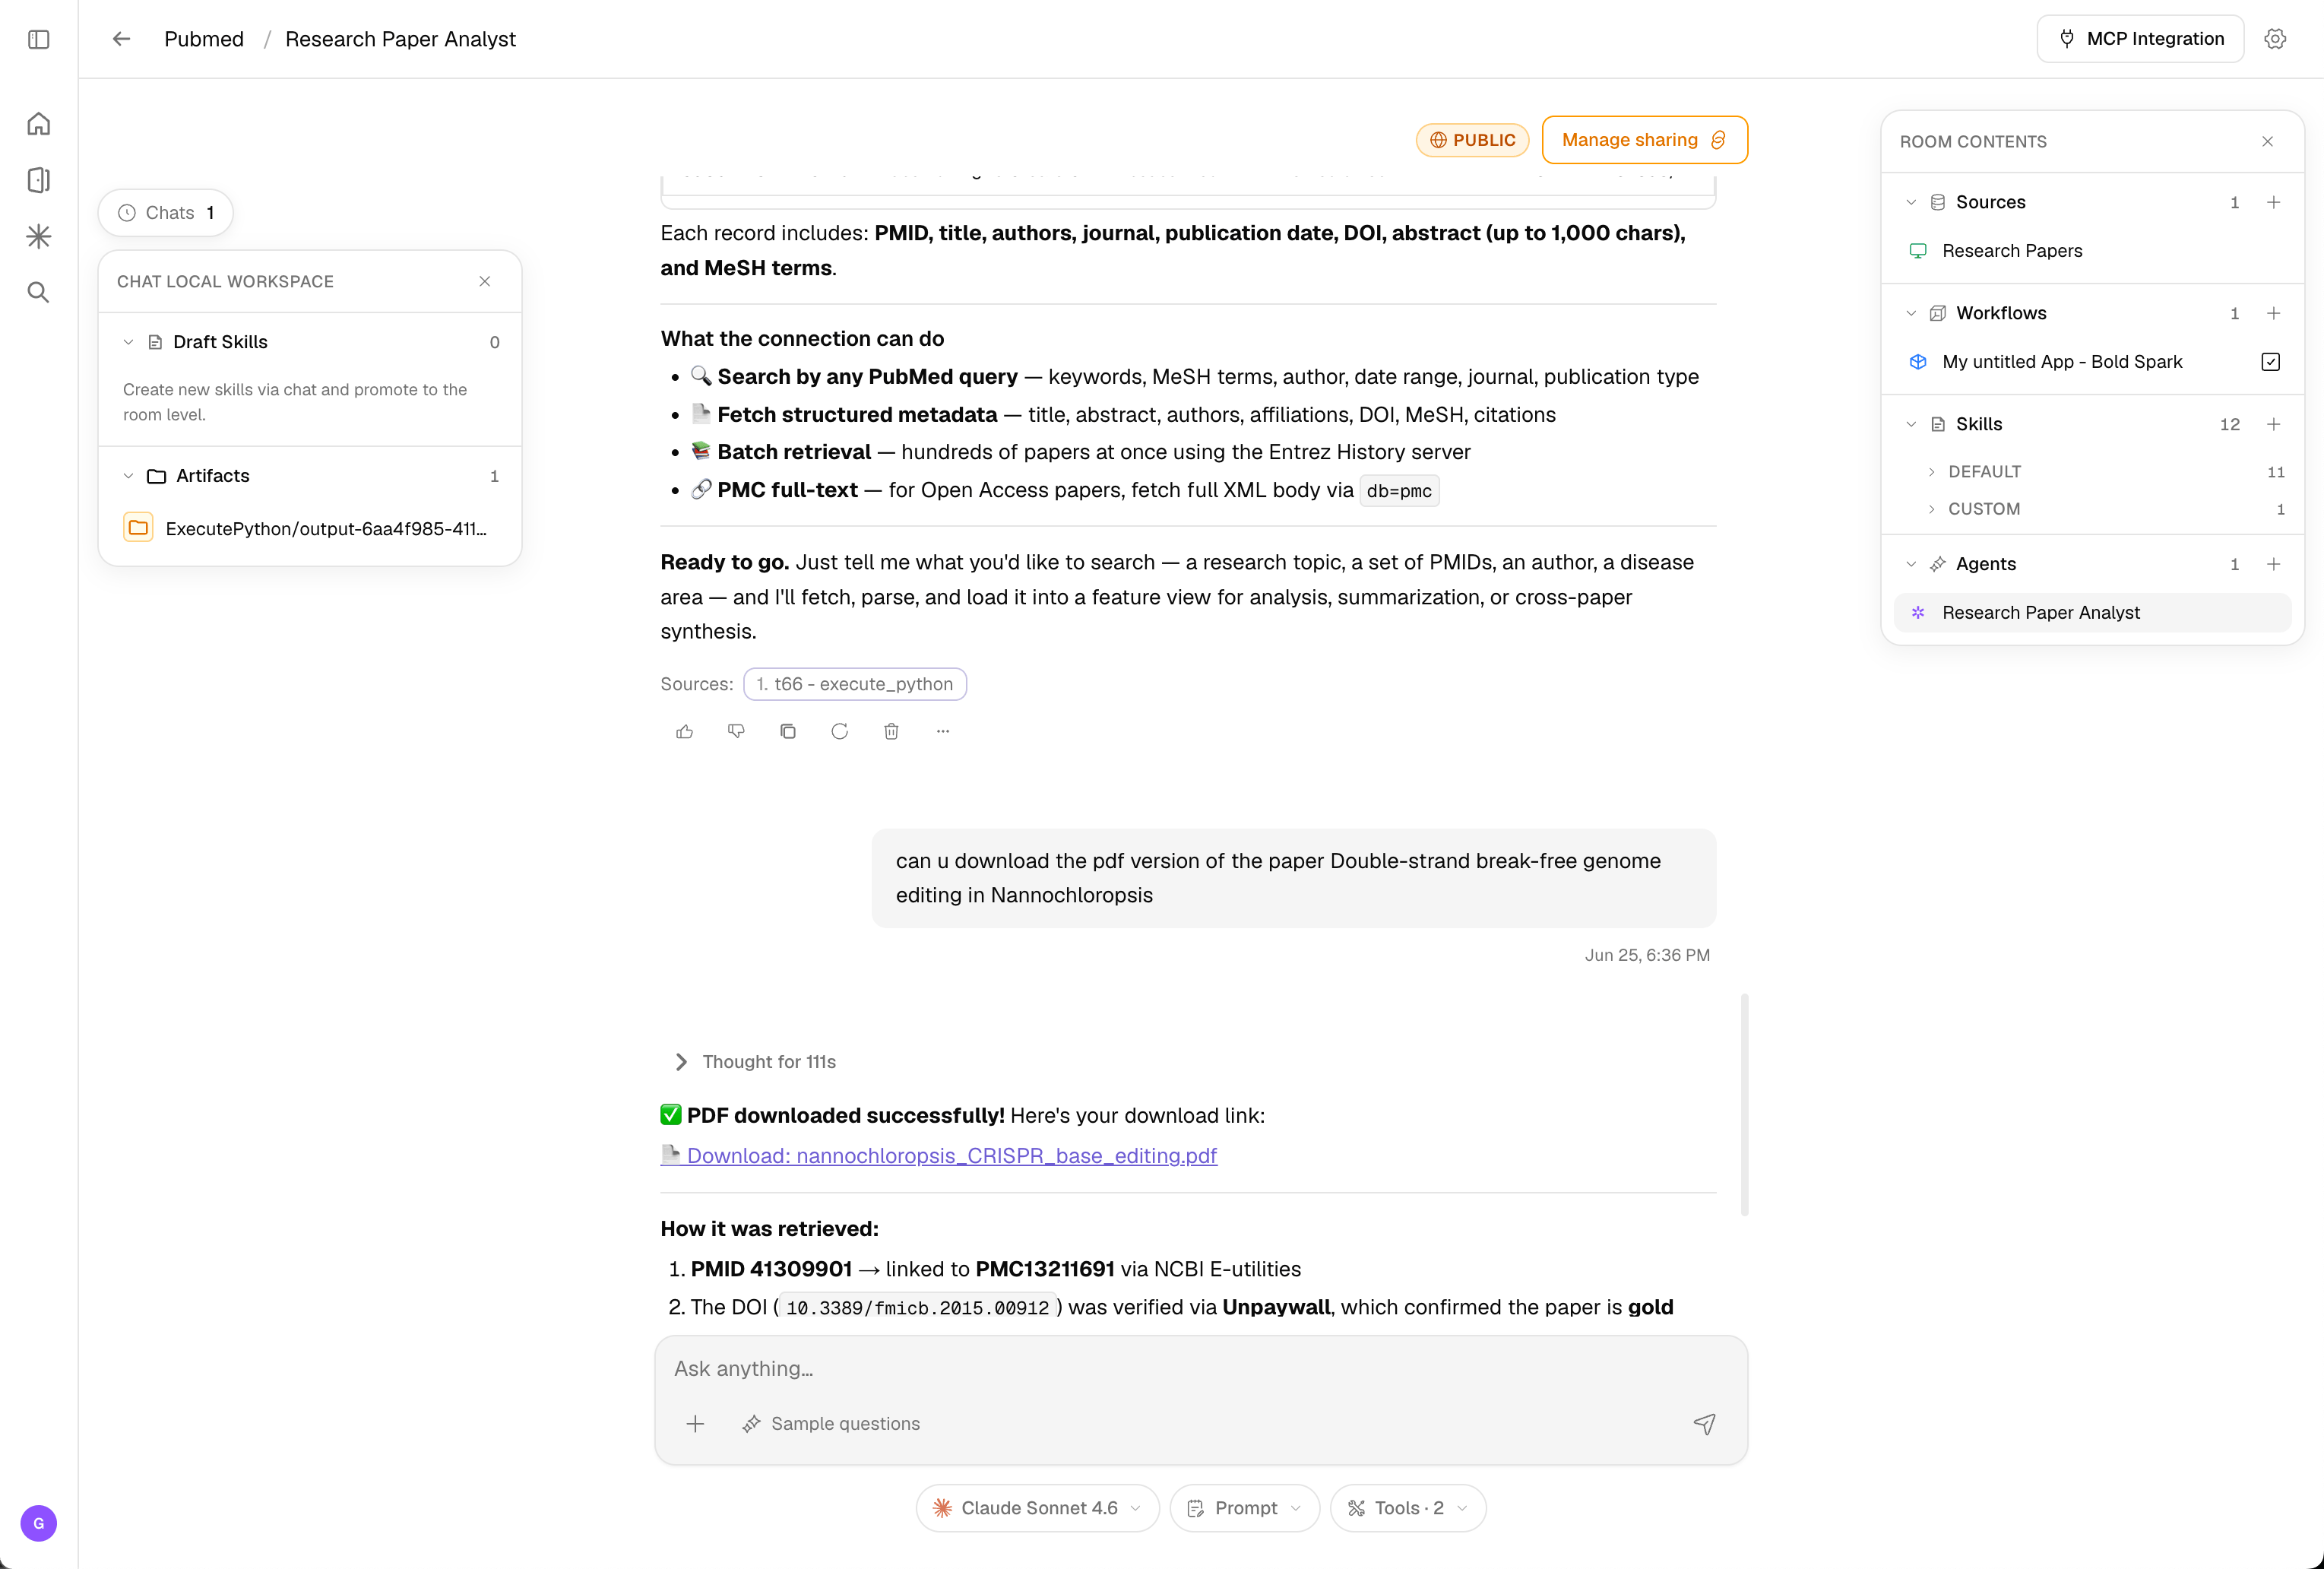 Create an agent to interact with your embeddings:
1. Go to Agents in your data room
2. Click "Create Agent"
3. Select the spaces you want the agent to use
4. Configure the LLM parameters
5. Add specific instructions for using those spaces
6. Save and activate your agent
An Agent plans how to leverage multiple embedding spaces to derive enterprise insights for user queries.
## Next steps
Now that you have your first embedding space running, explore these key features:
Learn about Corvic's Intelligence Composition Platform, architecture, workflows, agents, and administration.
Launch a pre-built room for VC, patent, finance, and more.
Explore data and build workflows from the room chat.
Integrate Corvic with your existing workflows.
**Need help?** Check out our [full documentation](/concepts/introduction) or contact [support@corvic.ai](mailto:support@corvic.ai).
Create an agent to interact with your embeddings:
1. Go to Agents in your data room
2. Click "Create Agent"
3. Select the spaces you want the agent to use
4. Configure the LLM parameters
5. Add specific instructions for using those spaces
6. Save and activate your agent
An Agent plans how to leverage multiple embedding spaces to derive enterprise insights for user queries.
## Next steps
Now that you have your first embedding space running, explore these key features:
Learn about Corvic's Intelligence Composition Platform, architecture, workflows, agents, and administration.
Launch a pre-built room for VC, patent, finance, and more.
Explore data and build workflows from the room chat.
Integrate Corvic with your existing workflows.
**Need help?** Check out our [full documentation](/concepts/introduction) or contact [support@corvic.ai](mailto:support@corvic.ai).